Why the Bravo Stops Working in the First Place
Troubleshooting the Honeycomb Bravo has gotten complicated with all the conflicting forum advice flying around. As someone who has run one of these throttles hard for two years straight, I learned everything there is to know about what actually breaks — and what just looks broken. Today, I will share it all with you.
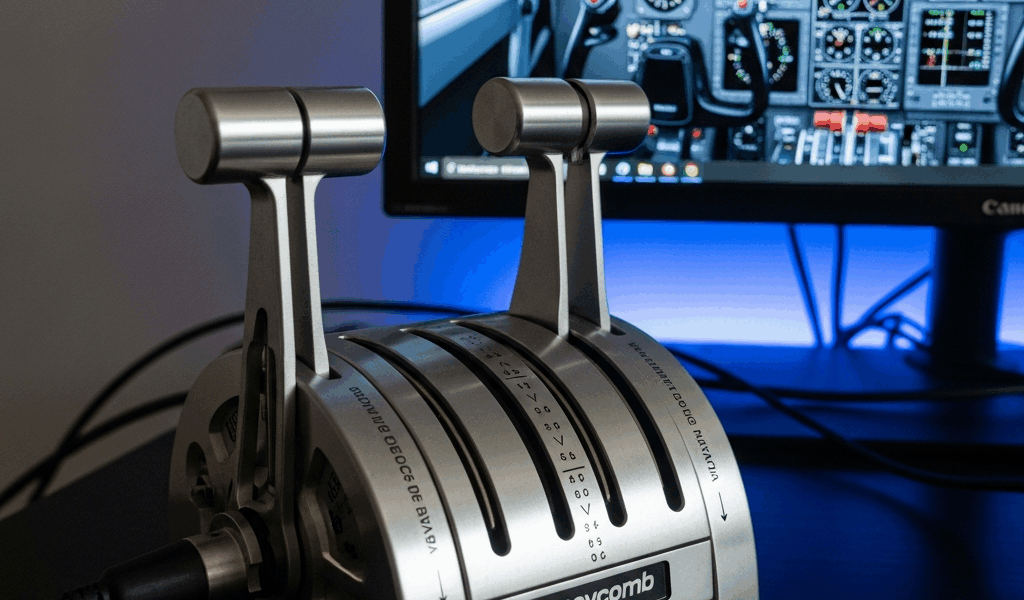
But what is a Bravo throttle failure, really? In essence, it’s a communication breakdown between the hardware and your PC. But it’s much more than that. The Bravo talks to Windows through USB enumeration, firmware versioning, and sim-specific axis mapping — three completely separate systems. When any one of them goes sideways, the throttle either vanishes from your sim entirely or shows up dead on arrival. The good news: most fixes take under five minutes. If you know where to look.
Start Here — USB Power and Port Swap Fix
Probably should have opened with this section, honestly. This is the fastest fix available — and the one I wasted three hours not trying while I dug through forums instead. The Bravo draws more current than a lot of motherboard USB 3.0 ports can cleanly deliver, especially when that hub is sharing a power rail with three other devices.
Unplug the Bravo. Wait ten seconds. Then do one of two things: move the cable to a different port, or run it through a powered USB hub instead of direct to the motherboard. I’m apparently sensitive to USB rail noise and a Anker 7-port powered hub works for me while the rear I/O ports never quite did. Don’t make my mistake.
If you’re using a powered hub, make sure it’s actually powered. I’ve found a surprising number of “powered” hubs sitting next to a desk power strip that were never actually plugged into it. Check the brick.
- Disconnect the Bravo’s USB cable entirely
- Wait 10 seconds for Windows to fully clear the enumeration
- Plug into a different port — preferably a powered hub if you have one, or a USB 2.0 rear I/O port if you were on a front panel header
- Launch Device Manager by right-clicking Start and choosing Device Manager
- Look under “Universal Serial Bus controllers” — the Bravo should appear as “Honeycomb Alpha/Bravo” with no yellow warning triangle next to it
- Open your sim and test throttle input
Yellow triangle or “Unknown Device”? Windows hasn’t loaded the driver yet. We’ll handle that in the next section. But if the Bravo appears cleanly and the throttle still doesn’t respond in-sim, skip straight to axis assignments below — that’s your actual problem.
Firmware and Driver Reset Steps
Frustrated by unexplained axis dropout that survived every reboot, I eventually discovered Honeycomb releases firmware patches that don’t auto-install — you have to pull everything and start clean. This new approach to driver management took hold a few firmware versions back and eventually evolved into the reset process Bravo owners know and rely on today.
First, uninstall the existing driver:
- Open Device Manager
- Find “Honeycomb Alpha/Bravo” under Universal Serial Bus controllers
- Right-click and select “Uninstall device”
- Check the box labeled “Delete the driver software for this device”
- Click Uninstall
- Disconnect the Bravo’s USB cable
Now download and install fresh:
- Go to honeycombavionics.com/support
- Download the latest Bravo driver and firmware updater for your OS — Windows 10 or 11, whichever applies
- Run the driver installer first and let it finish completely
- Reconnect the Bravo via USB
- Run the Honeycomb firmware updater — this is the step most people skip entirely. It checks the device and pushes any pending firmware. The Bravo will briefly disconnect and reconnect during this process. Let it finish
- Wait 30 seconds after reconnection, then do a full PC restart
Windows 11 users might hit a driver signature warning during installation. Click “Install anyway.” Honeycomb’s drivers are legitimate — just not Microsoft-signed. That is because independent peripheral makers rarely go through the full WHQL certification process. Totally safe.
Fixing Axis Assignments in MSFS 2024 and X-Plane 12
The Bravo shows up clean in Windows but the throttle levers do nothing in your sim. That’s an axis binding problem. The fix depends entirely on which sim you’re running.
Microsoft Flight Simulator 2024
MSFS 2024 introduced a particularly irritating bug — axis inputs stack on top of each other when old profiles survive from previous Bravo connections. The sim sees multiple throttle axes mapped to the same control and either freezes or reverses input. Deleting the corrupted profile is the only real fix. That’s what makes this one so endearing to us MSFS users — it’s invisible until it isn’t.
Delete the corrupted profile:
- Close MSFS completely
- Press Windows key + R, type %appdata%, hit Enter
- Navigate to LocalLow > Asobo > Microsoft Flight Simulator
- Find the folder called ProfilesPath or Input Profiles
- Delete any file with “Bravo” or “Honeycomb” in the filename
- Close the folder and relaunch MSFS
MSFS will auto-detect the Bravo as a fresh device. Now bind the axes manually:
- Go to Settings > Controls
- Under “Device Selection,” confirm “Honeycomb Bravo” is checked
- Search “throttle” in the control search box
- For each throttle control — Throttle 1, Throttle 2, and so on — click the binding field and physically move the corresponding lever on the Bravo
- Repeat with the right lever for right-side throttle bindings
- Save the profile under a custom name so MSFS doesn’t overwrite it later
Test with the Cessna 172 first — at least if you want a clean baseline before trying anything complex. Single lever controlling both engines means you bound correctly but need to adjust for aircraft type in settings.
X-Plane 12
X-Plane’s joystick mapping is more straightforward. The Bravo usually shows up immediately, but axis calibration sometimes lands reversed or stuck in a dead zone — and it stays that way silently until you recalibrate.
- Go to Settings > Joystick & Equipment
- Find “Honeycomb Bravo” in the Equipment list and click it
- Click the “Calibrate” button
- Move each control through its full range when prompted — throttle levers slow and deliberate, full travel both directions
- Complete calibration and restart the sim
If the throttle still reads backwards after that — pushing forward cuts thrust instead of adding it — go back into Joystick & Equipment, find the throttle axis entry, and check the “Reverse” checkbox directly next to it. That’s the whole fix. Two seconds.
Still Broken — When to Contact Honeycomb Support
So, without further ado — if you’ve worked through all three sections and nothing changed, you’re looking at a genuine hardware fault or a deep OS conflict. Before submitting a ticket, pull together this information first:
- Windows 10 or 11, build number if you can find it
- Flight sim and exact version — MSFS 2024, X-Plane 12.03, whatever applies
- USB port type in use — USB 3.0, USB 2.0, powered hub yes or no
- Whether the LED ring on the Bravo powers on at all when connected
- A screenshot of Device Manager showing the Bravo entry
Honeycomb support responds within 24–48 hours on weekdays. They’re thorough. If your Bravo is still under its two-year warranty from purchase date, they’ll replace the unit outright when diagnostics confirm a hardware failure — replacement typically ships in 5–7 business days.
While you won’t need a full hardware overhaul, you will need a handful of quality components to avoid this situation repeating. A powered USB hub might be the best option, as the Bravo requires consistent clean power delivery. That is because USB rail sharing on modern motherboards creates enumeration noise that cheaper unpowered hubs can’t filter out. Anker and Belkin both make solid 7-port powered models in the $30–$50 range. Worth every dollar.


Stay in the loop
Get the latest ultimate flight simulators updates delivered to your inbox.