“`html
What Causes Stick Drift in Flight Sims
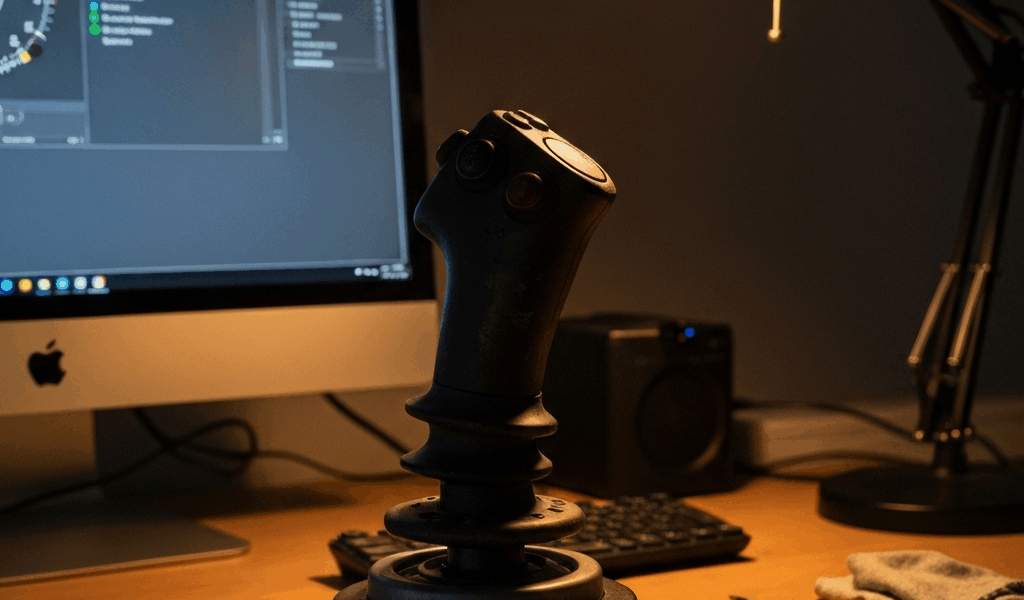
Flight sim stick drift is genuinely frustrating. You’re on approach into KJFK, and suddenly your aircraft pitches nose-down without any input from you. That’s stick drift—and it has three distinct causes that matter when you’re fixing it.
First, there’s electrical drift. Your joystick sends voltage values to your PC representing stick position. Over time, the potentiometers inside wear out or dust accumulates on the contact points, causing the signal to drift from its center position even when the stick sits motionless. Then there’s mechanical wear—the gimbal itself develops play, the ball joint loosens, or internal springs lose tension. And third is software calibration lag, which happens surprisingly often after driver updates or Windows patches reset your control settings without you realizing it happened.
Flight sims expose this problem far more than arcade games because they demand absurd precision. A fighter jet sim requires your stick to return to perfect center for level flight. Arcade dogfighters? They don’t care. You’re moving constantly, and small drifts get masked by your inputs. In MSFS or X-Plane, drift of just 2–3% on your pitch axis sends you spiraling toward the ground.
Step 1 — Recalibrate Your Stick in MSFS
Probably should have opened with this section, honestly. Most stick drift complaints disappear after recalibration because users skip this step after a BIOS update or new driver install. It’s the easiest fix and takes five minutes.
Open MSFS and navigate to Options > Controls > Devices. You’ll see a list of connected hardware. Select your joystick, then scroll down to find the “Calibration” button. Click it.
The calibration window shows you two critical things: “Center Axis” and “Full Deflection.” Center Axis is your resting position. Move your stick in full circles—forward, back, left, right, and all diagonal corners. The sim records the extremes of movement. When you’re done, the software knows your stick’s physical limits and where dead-center actually lives on your hardware.
This matters because potentiometer wear doesn’t always center equally. Your stick might report “center” at 48% instead of 50%. Recalibration tells MSFS exactly where that center is, correcting for the hardware’s quirks instead of fighting them.
After recalibrating, test it. Spawn on a runway in cold-and-dark mode. Don’t touch the stick. Watch your pitch, roll, and yaw indicators. If they’re holding steady at zero, you’re good. If you see creep—a slow drift toward pitch-up or a banking tendency—that’s when you continue to Step 2.
Step 2 — Update or Reinstall Device Drivers
Driver issues cause more stick drift than most pilots realize. I learned this the hard way after a Windows update tanked my Thrustmaster calibration data without warning.
For Thrustmaster hardware (T.16000M, Warthog, Cougar), visit thrustmaster.com, find your device, download the latest driver, and uninstall the old one first. Control Panel > Programs > Uninstall a Program, search for Thrustmaster, remove it completely. Then install the new version. Restart your PC after—don’t skip this. Windows needs to reload the driver stack.
Virpil and VPC users should head to virpil.com. Their drivers update frequently, and you’ll want the newest one. Download, uninstall old, install fresh, restart.
CH Products (CH Fighterstick, Pro Throttle) hosts drivers at chproducts.com. Same process: uninstall, download latest, reinstall, restart.
Honeycomb (Alpha Flight Controls) users find drivers at honeycombaero.com. Their software also includes a built-in calibration tool—use that after updating the drivers.
Why this matters: Windows updates sometimes corrupt device profiles or reset calibration data without notification. A clean driver install restores factory calibration and patches any firmware issues in your stick’s microcontroller. It’s tedious, but it works.
Once your PC reboots, open MSFS again and recalibrate your stick a second time. The fresh driver may have changed how your hardware reports position data.
Step 3 — Check Deadzone Settings in Your Sim
Deadzone is a software band-aid. It doesn’t fix drift—it masks it temporarily. But checking your deadzone setting tells you something important about what you’re dealing with.
In MSFS, go to Options > Controls > Devices > [Your Stick] and scroll to “Deadzone.” The default is usually around 0.05 (5%). Increasing this to 0.10 or 0.15 creates a larger “dead area” where small stick movements don’t register. If drift disappears when you bump deadzone to 0.15, you’re seeing electrical drift from potentiometer wear, not mechanical failure.
In X-Plane, the setting lives under Joystick Configuration > [Your Device] > Axis. You’ll see “Deadzone” listed as a percentage. Same concept—higher numbers ignore smaller movements.
DCS has deadzone controls in Options > Control Settings > Joystick > [Your Stick] > Deadzone. Again, increase it and test.
The catch: increasing deadzone ruins precision. Your stick becomes mushy and unresponsive at small deflections. This is livable temporarily while you investigate, but it’s not a permanent solution — at least if you care about landing approach accuracy. If your stick needs 0.15 deadzone to fly level, your hardware is wearing out and software alone won’t save it.
When to Replace Your Stick Hardware
If you’ve recalibrated, updated drivers, and reinstalled Windows itself but still see drift after every flight, your hardware is failing. I’m apparently cursed with electronics, and I’ve replaced three sticks in seven years.
Three red flags indicate replacement time. First: drift persists across multiple sims (MSFS and X-Plane show the same problem). Second: you see visible corrosion, discoloration, or debris inside the gimbal when you look at it. Third: the stick is physically loose—the base wobbles on your desk, or you can move the stick hand with zero resistance when it’s powered off.
Budget alternatives exist depending on what you’re flying. If you’re a casual MSFS 2024 bush pilot, the Logitech Extreme 3D Pro ($40–50) works solid for the price and has a quick potentiometer replacement design. For serious sim work, entry-level HOTAS like the Thrustmaster T.16000M FCS ($150–180) offers separate throttle and stick, better build quality, and driver support across MSFS, X-Plane, and DCS without breaking the bank.
Premium? VPC Constellation or Virpil MongoosT50 sticks run $400–600 and are industry standard. They come with smooth, durable gimbal designs rated for 10,000+ hours. Both ship with detailed calibration utilities that put consumer hardware to shame.
Before buying replacement hardware though, try this: borrow a friend’s stick for an hour and plug it into your PC. If drift disappears immediately, your original stick is the culprit. If drift reappears with different hardware, something in your system—motherboard USB port, driver conflict, Windows setting—is creating the problem, and replacement won’t help. Don’t make my mistake of buying new gear when the problem was my motherboard.
Stick drift doesn’t have to end your flight sim session. Start with recalibration, move to drivers, check deadzone, and only then consider hardware replacement. Most drift issues resolve in the first two steps because they’re software-side problems masquerading as hardware failure. The precision demands of flight simulation expose these issues fast, but they’re also the easiest to diagnose and fix if you know where to look.
“`


Stay in the loop
Get the latest ultimate flight simulators updates delivered to your inbox.