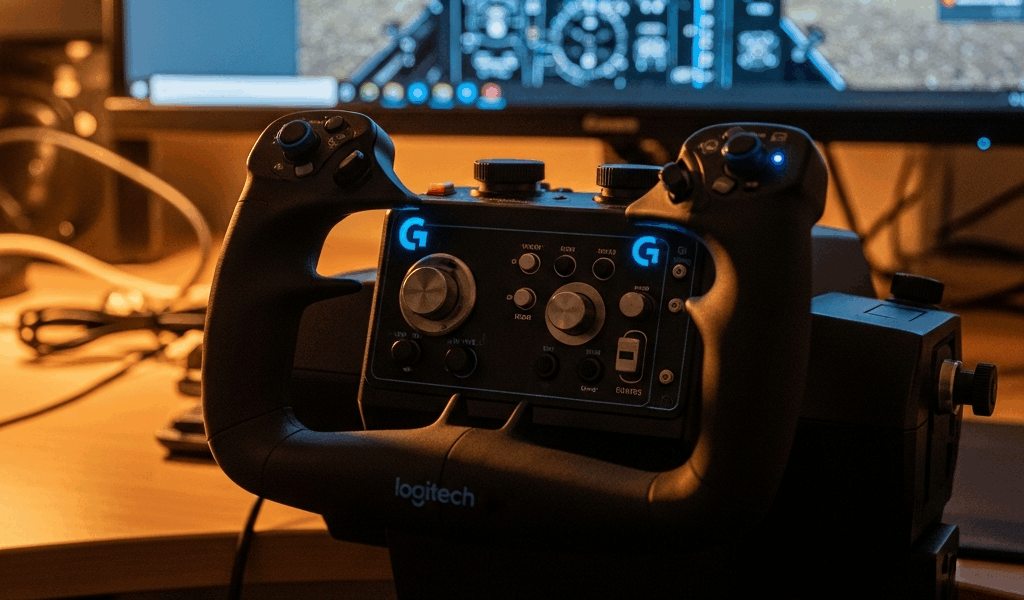
The Logitech G Flight Yoke System can work with Microsoft Flight Simulator 2020 and 2024 on a Windows PC, but a reliable setup requires three separate checks: Windows must see the hardware, the simulator must select the correct device profile, and every analog axis must be assigned only once.
This guide covers the current Logitech-branded system and older Saitek-branded units with the same basic hardware lineage. Menu names differ between MSFS 2020 and MSFS 2024, so follow the section for your simulator rather than copying screenshots from another version.
Before connecting the yoke
Confirm what hardware you have. Logitech’s Flight Yoke System includes the yoke and a three-lever throttle quadrant. The yoke connects to the PC by USB. The bundled throttle quadrant connects to the yoke through its dedicated round connector; a separately sold USB Flight Throttle Quadrant is a different device and appears separately in Windows and the simulator.
Logitech lists Windows 10 and Windows 11 support, a USB 2.0 connection, five axes across the system, one hat switch, and programmable buttons. It is a PC peripheral. Do not assume it works on an Xbox console simply because Microsoft Flight Simulator runs there; Microsoft warns that most PC flight peripherals are not Xbox-compatible unless the manufacturer explicitly says so.
1. Mount the yoke and throttle correctly
- Insert the yoke’s mounting-clamp prongs into the holes in the yoke base.
- Position the yoke on a rigid desk or cockpit shelf and tighten the clamp screw until secure. Do not overtighten it; Logitech warns that excess force can damage the clamp.
- Attach the supplied mounting plate to the throttle quadrant with its four screws. The plate can be oriented for mounting above or below the desk.
- Clamp the throttle where all three levers can travel fully without striking the desk, keyboard, or another control.
- Connect the bundled throttle quadrant to its socket on the yoke before connecting the yoke’s USB cable to the PC.
Move the yoke through its full pitch and roll travel and move every lever from stop to stop. A cable, wall, clamp, or desk edge that limits physical travel will look like a calibration problem later.
2. Connect directly during first setup
For the first test, connect the yoke directly to a stable USB port on the PC rather than a monitor, keyboard, dock, or unpowered hub. This removes an extra layer from diagnosis. After the controls work, you can test a suitable powered hub if your cockpit requires one.
The USB ports on the side of the yoke form a non-powered hub. Logitech says low-power flight panels can work there, but higher-power devices may exceed the available power unless the optional adapter is used. Do not use those ports to charge a phone or power an unknown device while diagnosing yoke disconnects.
3. Confirm Windows sees every axis
Do this before opening MSFS:
- Press Windows key + R, type joy.cpl, and press Enter.
- Select the Logitech or Saitek Flight Yoke entry and open Properties.
- Move the yoke left/right and forward/back. Confirm the corresponding axes move smoothly through their range.
- Move throttle, propeller, and mixture levers individually and press every button and rocker switch you plan to use.
- Release the yoke and note whether the displayed axes settle consistently near center.
If the device does not appear in Windows, changing MSFS bindings cannot fix it. Try a different direct USB port, reboot with the yoke disconnected, reconnect after Windows loads, and use Logitech’s official support page for any software or driver offered for your exact product. Avoid third-party driver-download sites.
If Windows detects the device but an axis jitters, stops short, or never centers, retest with other USB devices disconnected. Use Windows calibration only when the raw test shows a genuine range or center problem; do not calibrate repeatedly to mask a damaged potentiometer, loose connection, or physical obstruction.
4. Set up the yoke in Microsoft Flight Simulator 2024
MSFS 2024 detects connected input devices on its Controls screen. Microsoft says recognized devices may receive a preset; otherwise the controls must be assigned manually.
- Open Settings → Controls.
- Select the Flight Yoke from the device list. Make sure you are editing the yoke, not the keyboard, mouse, or gamepad.
- If a default preset exists, duplicate it before making major changes. Give the copy a clear name such as “Logitech Yoke – GA.”
- Open the flight-control-surface assignments and move the yoke when the interface asks for an input.
- Bind roll to the simulator’s aileron axis action and pitch to its elevator axis action. Use axis actions, not paired digital “left/right” or “up/down” button actions.
- Select the throttle-quadrant axes and bind them to throttle, propeller, and mixture actions appropriate to the aircraft.
- Save, then create aircraft-specific profiles when an airliner, twin, turboprop, or other configuration needs different lever assignments.
MSFS 2024 separates global and aircraft-specific control schemes. Verify the active aircraft and active profile before concluding that a saved binding disappeared. Microsoft has continued changing and fixing the control interface through simulator updates, so labels and profile controls may shift.
5. Set up the yoke in Microsoft Flight Simulator 2020
- Open Options → Controls Options.
- Select the Logitech/Saitek yoke from the devices across the top.
- Change the filter from “Assigned” to “All” when an action is not visible.
- Bind the yoke to Ailerons Axis and Elevator Axis.
- Bind the three quadrant levers to the required throttle, propeller, and mixture axes—or to individual engine axes for a multi-engine profile.
- Validate and save a named custom profile instead of repeatedly overwriting an unknown default.
The exact wording can vary with simulator updates and localization, but the important distinction remains: analog levers and yoke travel belong on continuous axis commands.
6. Remove duplicate and incorrect bindings
Many “yoke fights me” problems come from two devices controlling the same function. Check the yoke, throttle, keyboard, mouse, gamepad, pedals, and any other connected controller for:
- aileron or elevator assigned to two analog devices;
- an analog axis plus digital aileron/elevator buttons firing together;
- throttle bound both to “Throttle Axis” and “Throttle 1 Axis” unintentionally;
- mixture, propeller, or spoilers mapped to the wrong lever;
- camera controls bound to the yoke axes; or
- AI piloting or assistance options overriding manual input.
Clear only the confirmed conflict. Do not erase every default binding at once unless you intend to build and test a complete profile from scratch.
7. Set sensitivity and dead zones from evidence
There is no correct universal sensitivity number for this yoke. Aircraft flight model, simulator version, control profile, hardware wear, desk geometry, and pilot preference all affect the result.
Start with a linear curve and the smallest dead zone that produces a stable center. In the input graph:
- verify full left/right roll reaches the endpoints;
- verify full forward/back pitch reaches the endpoints;
- confirm the center does not flicker enough to move the aircraft; and
- add only enough dead zone to suppress measured center noise.
If the aircraft feels too sensitive near center, make a modest curve adjustment, test one aircraft in calm conditions, and change one variable at a time. Large dead zones hide useful control travel and can make approaches harder.
8. Map the throttle quadrant intelligently
For a typical single-engine piston aircraft, the common mapping is:
- black lever: throttle axis;
- blue lever: propeller axis; and
- red lever: mixture axis.
That color convention is a starting point, not a requirement. A jet may use one lever for throttle and the others for spoilers and flaps. A twin may need separate engine throttle assignments or an additional quadrant. Create a separate profile rather than forcing one mapping onto every aircraft.
If a lever runs backward, use the simulator’s axis-reversal option for that binding. Do not invert Windows calibration merely to correct one aircraft profile.
9. Test before adding more hardware
- Load a simple default aircraft at a parking stand.
- Open the cockpit control surfaces or an external view and confirm yoke direction.
- Move each quadrant lever and confirm only the intended cockpit control moves.
- Taxi slowly and verify no unexpected steering or brake binding.
- Fly a short circuit in calm weather, checking center response, full travel, trim, and throttle range.
Only after that test should you add pedals, panels, USB hubs, programming software, or complex aircraft profiles. Adding everything simultaneously makes faults much harder to isolate.
If the yoke is not recognized
Use the failure boundary:
- Missing from joy.cpl: diagnose USB connection, power, Windows enumeration, or hardware first.
- Works in joy.cpl but missing from MSFS: restart the simulator after connecting it, inspect the device list and filters, create/select a profile, and test without conflicting community add-ons.
- Visible but no aircraft response: bind the continuous axis actions and remove duplicate assignments.
- Disconnects during flight: test a direct USB port and review Windows USB power management and hub load.
- Throttle not visible separately: remember that the bundled quadrant connects through the yoke and its axes normally appear under the yoke device; a standalone USB quadrant appears separately.
For a deeper failure sequence, use our Saitek/Logitech yoke not recognized troubleshooting guide.
Related flight-sim hardware guides
- Logitech Flight Yoke System review
- Beginner flight-sim hardware guide
- Yoke vs joystick vs HOTAS
- Why flight-sim controllers disconnect
Official references
- Logitech Flight Yoke System manual
- Logitech: using the yoke’s USB hub
- Microsoft Flight Simulator 2024 controls and peripheral guidance
- Microsoft: choosing an MSFS 2024 hardware setup
Bottom line: prove the yoke and all five axes work in Windows, bind analog axes only once, create a named simulator profile, and tune curves only after a calm-air test. That sequence solves setup problems more reliably than copying someone else’s sensitivity numbers.



Stay in the loop
Get the latest ultimate flight simulators updates delivered to your inbox.